BikepackingAccessories
by avantum.

Avantum Brands imports Old Man Mountain racks to the EU since 2005. We ship all over Europe.


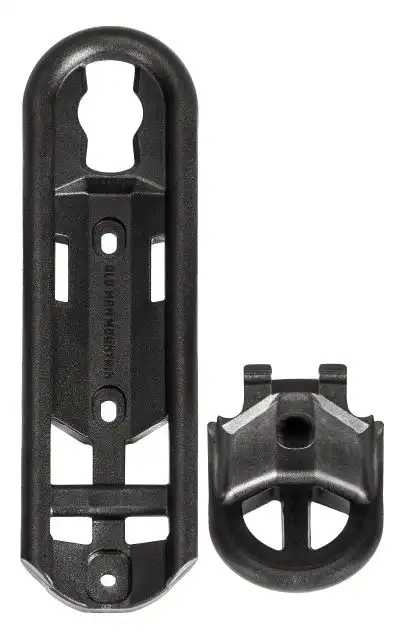
Here you can see how to install the FLiP Cages
FLIP Cages are built to carry up to 9.9lbs (4.5kg) of weight on each cage, but many fork eyelets are NOT capable of carrying that much weight! Check your frame manufacturer’s weight limit and adhere to the lowest rating. Alternatively you can mount FLIP Cages to our Axle Pack or Elkhorn rack to utilize the full weight capacity.
Tools you will need:
- 3mm hex
- 4mm hex
- Torque wrench
Don’t forget to apply anti-seize (preferred) or grease to all bolts. This will prevent the bolts from seizing and making it hard to remove the bolts down later on. We do use Nyloc nuts where needed to prevent bolts from loosening on their own.
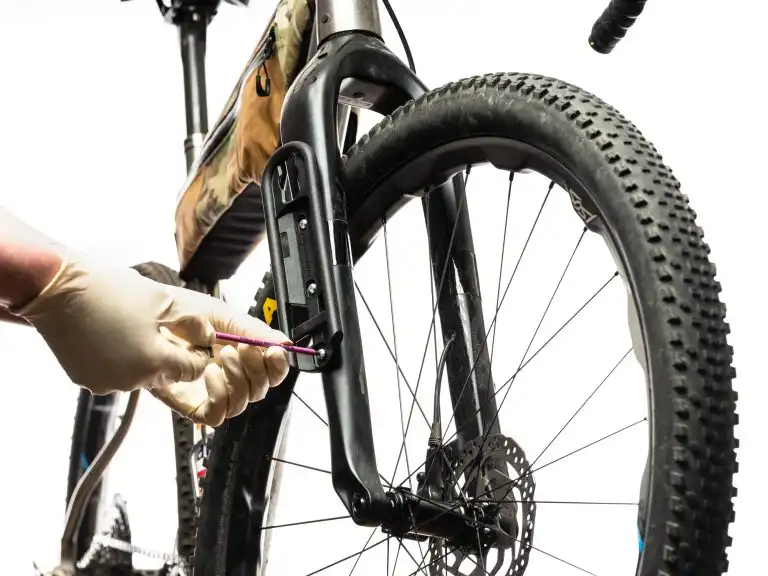
STEP 1: Mount the FLiP Cages
- FLIP Cages come with an optional cargo foot. If you are only using FLIP Cages with a FLIP compatible bag the foot is optional.
- Install FLIP Cages using 3 bolts torqued to 3nm.
- If your bike only has 2 eyelets you will need to use a rack or 3-pack adapter like our Elkhorn or Axle Pack.
Note:
Some forks have eyelets with recessed threads. Be sure that the bolts thread in for a minimum of three full turns of engagement.
STEP 2: Attach FLiP Compatible bags
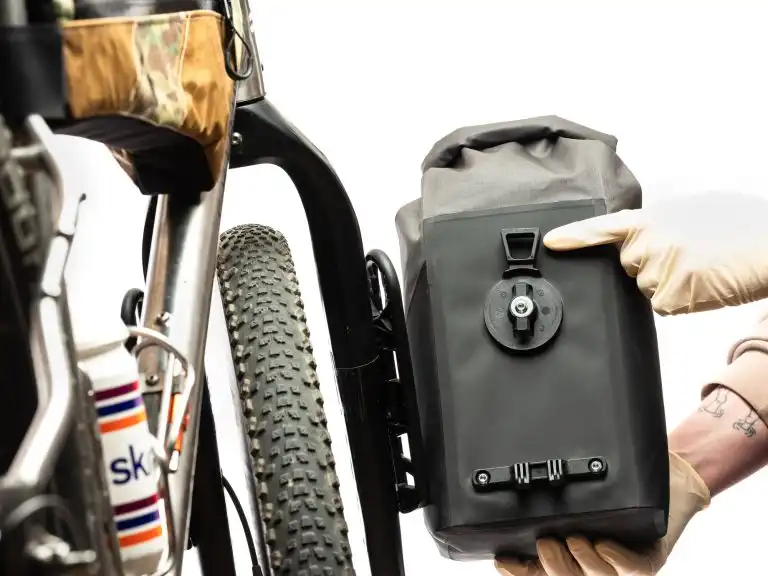
- Tilt the bag and engage the lower hooks as shown in the image below. Make sure both hooks are fully engaged in the cage.
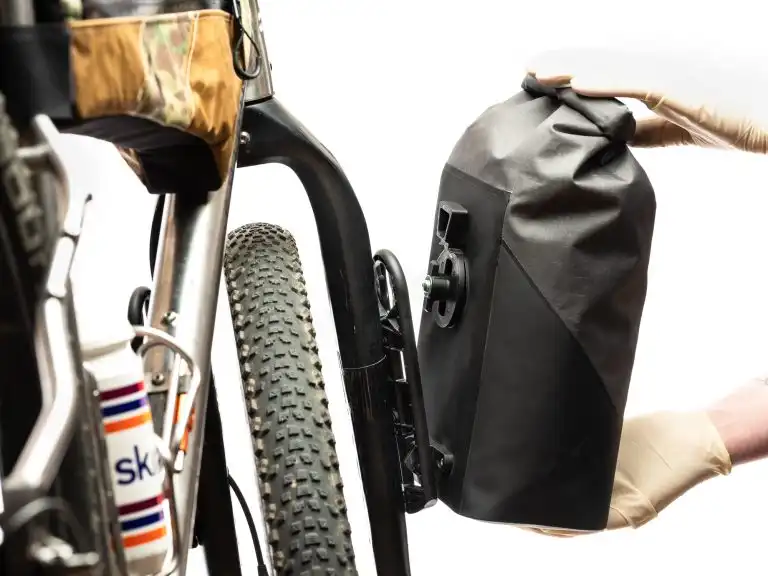
- Tip the bag up with the Latch Handle in the vertical position.
- Rotate the handle 90 degrees to reach the locked position. The handle is designed to be rotated either direction for ease of use.
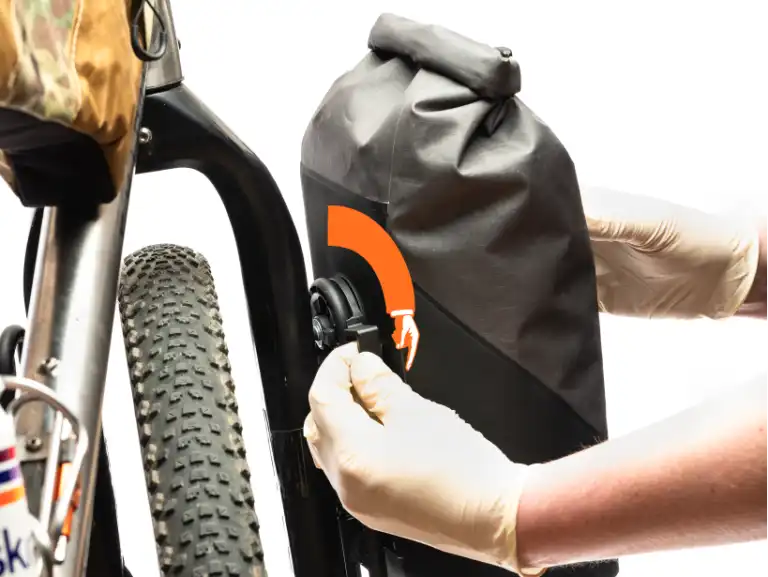
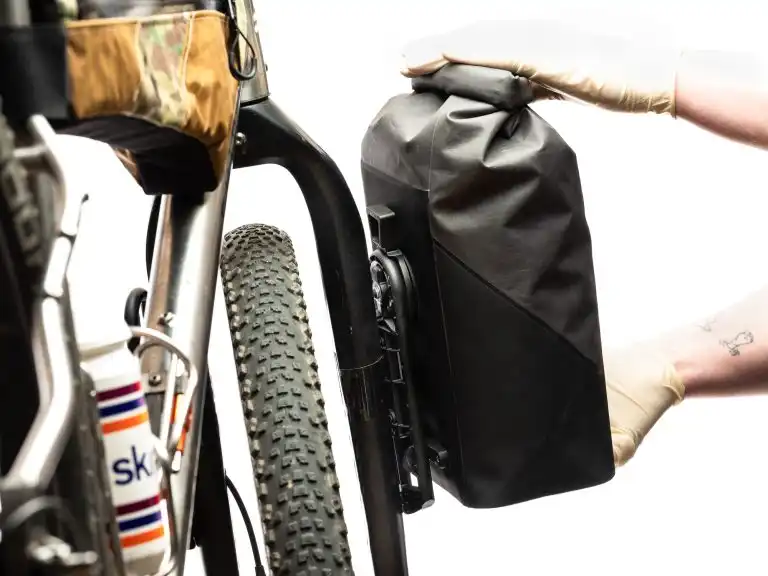
Check to ensure the bag clears the wheels spokes, or brakes by a minimum of 2".
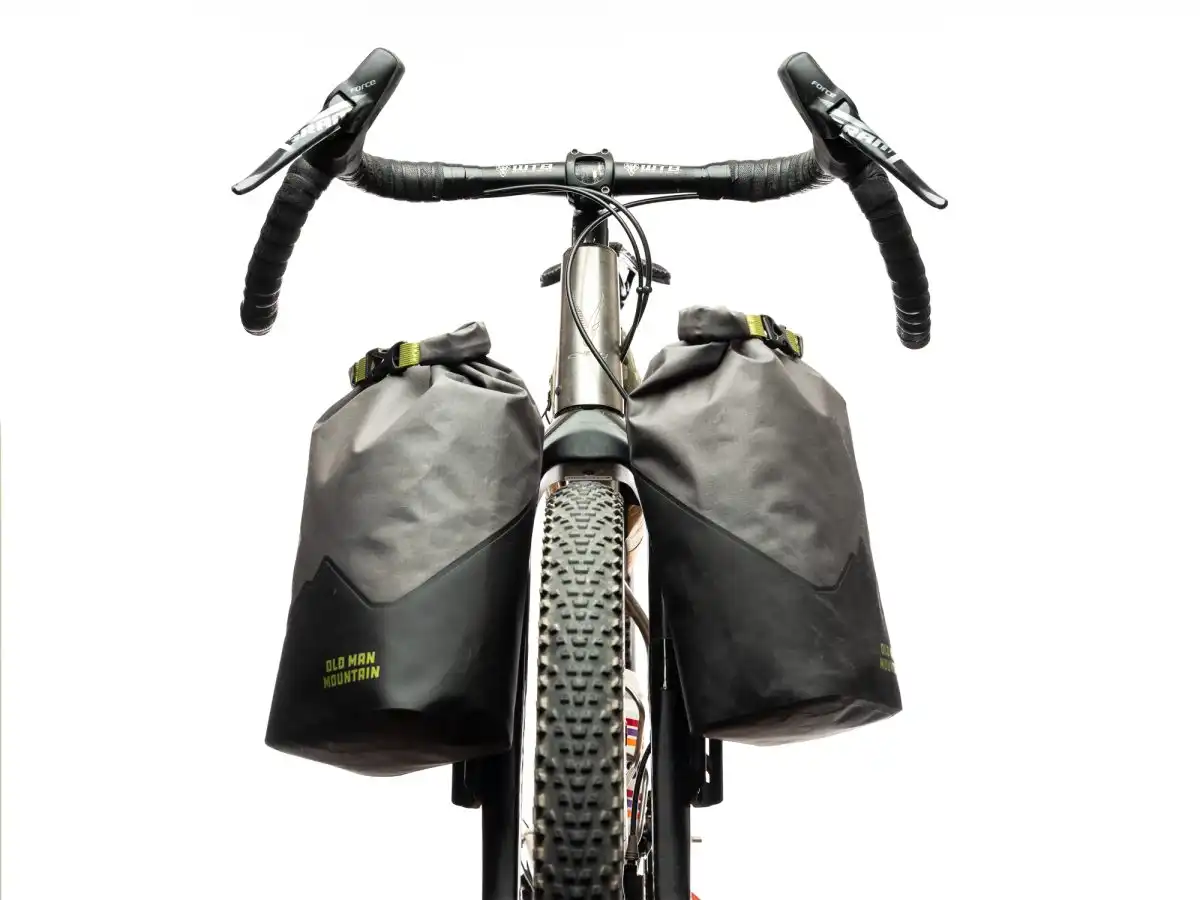
The image above shows the bags too close to the tire.

The image above shows the bags mounted with plenty of clearance.
STEP 3: Final check and hardware tightening
Check that all hardware is torqued to 3nm.
Always double check all hardware and parts before each ride!
GOOD JOB! YOU'RE NOW RIDE TO RIDE.
We are excited to be a part of your biking adventures.
Thank you for using Old Man Mountain Racks!
We are always happy to see how the rack looks when mounted on Your bike. So if you feel like it, please send us a picture of the rack and your bike.
This will also help other customers visualize how the rack will work for them on their bikes.
